Install into the soil
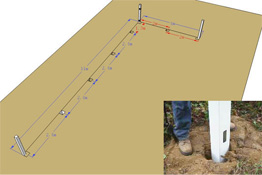
Step 1 Set up the corner posts,dig the holes approximately 20 cm wide and 50 cm deep. Pull straight line from the start to the end.
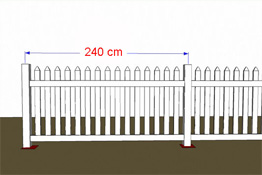
Step 2 Dig the holes for posts every 240cm. Assemble the vinyl fence panel together. The rails are locked to posts by notches
Step 3 Fill the post holes with concrete. Using the level to keep the posts straight. Pull another string on the top to keep the fence level.

Step 4 Cap the posts by pvc glue or super glue.Clean the vinyl fence.
Install on the concrete / wood ground

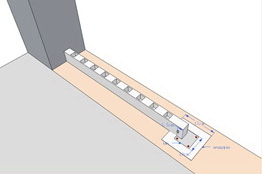
Step 1 Place the position of the corner post and
the end post
. Pull an straight-Line.
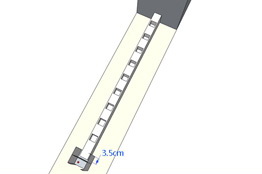
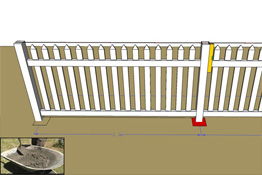
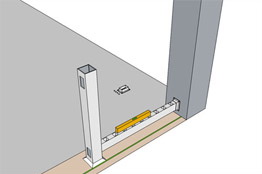
Step 2 Place the post mount to the position,
along the straight line, put the rail into
the post about 3 cm.
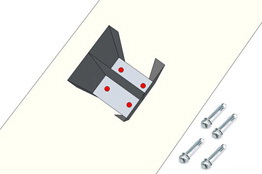
Step 3 Use the steel bolts to fix the post mount
on the concrete ground
.If on
the wood ground, please use the screws to fix the post mount.
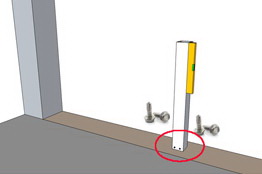
Step 4 Fix the vinyl post to the post mount.
Keep the post straight.
The position to screw should less than
2.5cm from the bottom for a cover
.

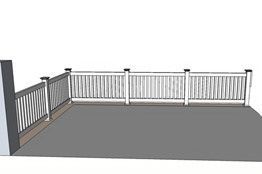
Step 5 Assemble the fence panels.
Screw the top rail inside if sliding.
Step 6 Cap the posts by pvc glue or super glue
. Clean the vinyl fence.
Install on the concrete ground Recommended
Step 1 Locate the position of the corner post and
the post, then
pull an straight-Line.
Step 2 Place the post mount to the position,
along the straight line, the rail enter the post about 3 cm.
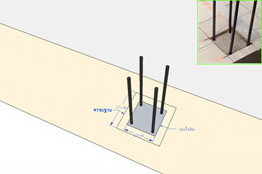
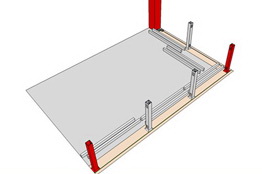
Step 3 Fix 4 steel bars into the concrete ground
firmly (
Driller # 6.5).
To invoid make the ceramic tile crack, cut
ing the drilling area off is very helpful.
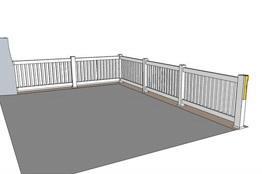
Step 4 Assemble the vinyl fence panels
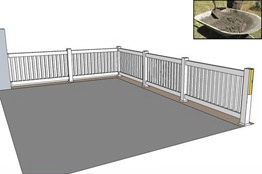
Step 5 Fill the concrete into the posts.
Let the concrete higher than the steel bars.
Use the level keep the posts straight.
Step 6 Cap the posts by pvc glue or super glue. Clean the vinyl fence
Fix to the wall
Step 1 Locate the position to fix the rail connector.
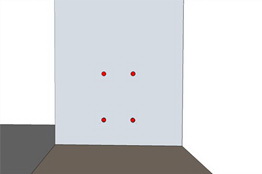
Step 2 Drill thel wall (driller No. 7). Insert plastic expansion bolt.
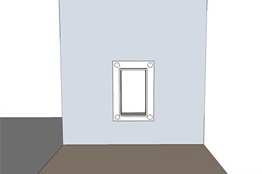
Step 3 Fit the rail connector to the wall. Cap the screw holes.
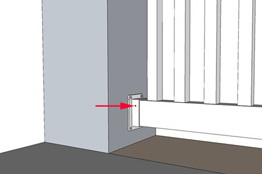
Step 4 Insert the rail into the connector. Screw fixing